
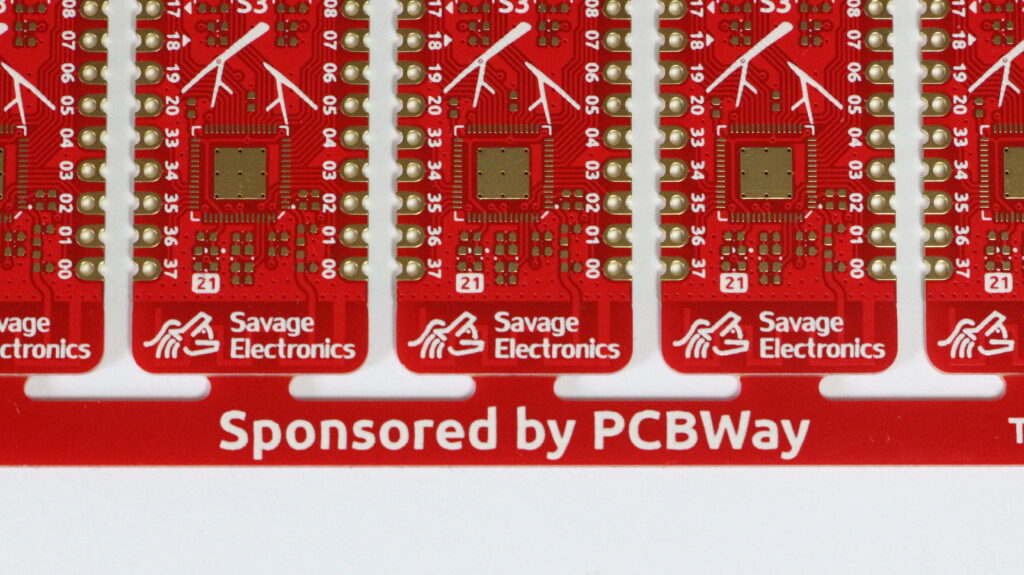
Sometimes there are projects that need more than one piece of the same PCB or it’s a design that is probably going to be used with other projects, that is the case for my ESP32-S3 Stick controller, as the ESP32-S3 is a very powerful and versatile microcontroller with Wifi and BLE and a lot of memory I am going to be using this PCB with many projects.
If you have been following my projects you will notice that it is pretty much the same development board as the ESP32-S2 Stick but now integrating the ESP32 S2 MCU and changing all the resistors, capacitors, and LEDs from 0603 to 0402 that makes a huge change for the PCB layout process.
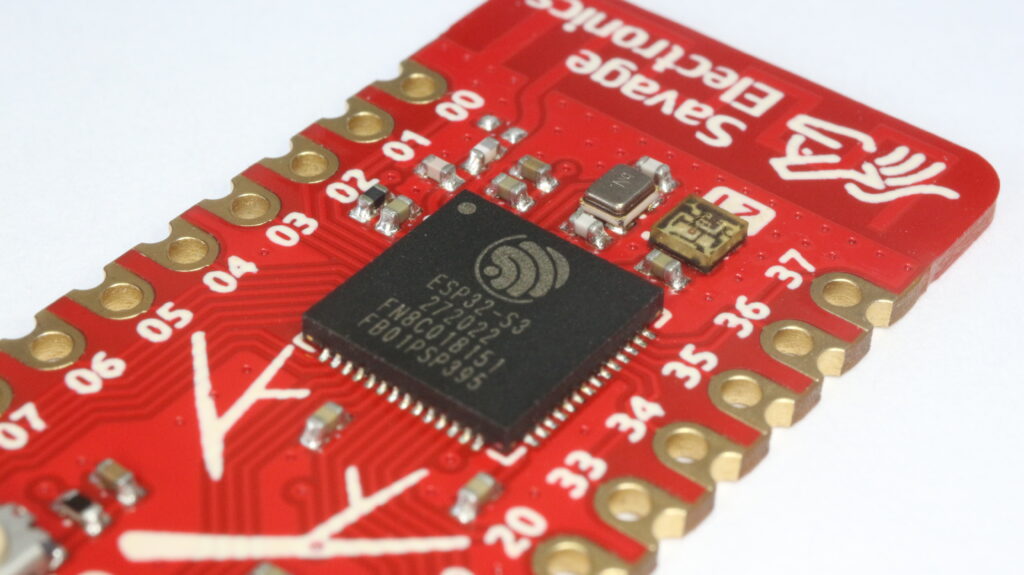
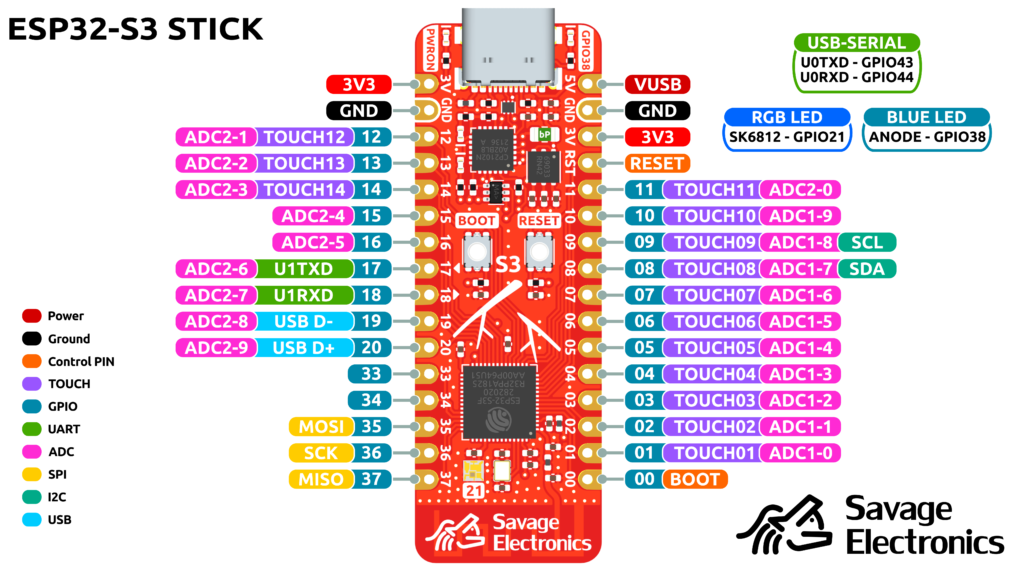
The ESP32-S3 is a dual-core XTensa LX7 MCU, capable of running at 240 MHz. Apart from its 512 KB of internal SRAM, it also comes with integrated 2.4 GHz, 802.11 b/g/n Wi-Fi, and Bluetooth 5 (LE) connectivity that provides long-range support. It has 45 programmable GPIOs and supports a rich set of peripherals.
The ESP32-S3 Sticks incorporate some special features that I consider every ESP32 development board must have, such as a USB-Serial converter with RX and TX LEDs, a simple GPIO-LED, and an addressable RGB LED, at a second hand is always useful to have a reset and a general purpose push button.
This board like many ESP32 boards is breadboard friendly for prototyping but it also has castellated pins that allow it to be soldered directly to other PCB like any other SMD component, so that makes it a very versatile board for rapid prototyping or development.
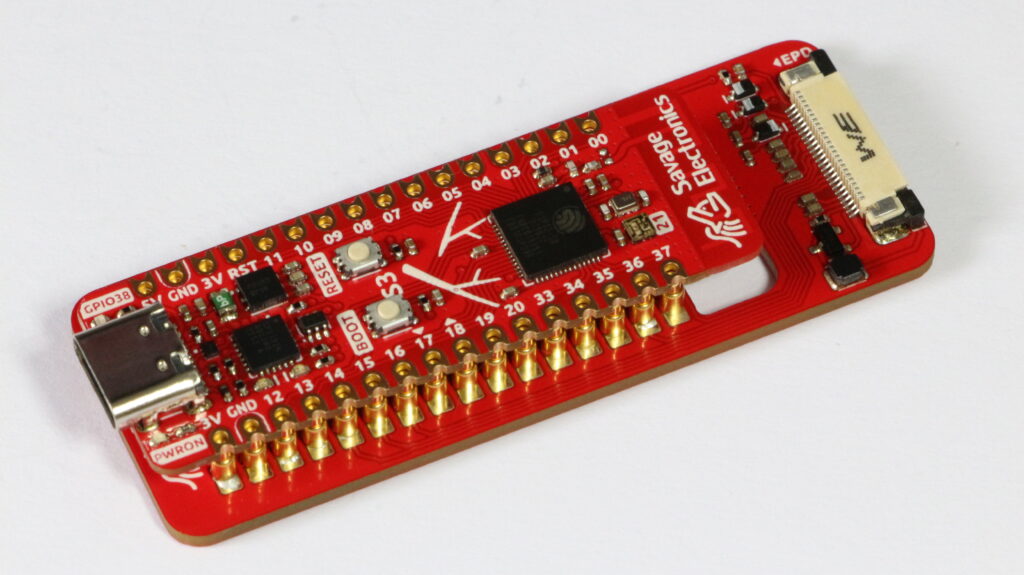
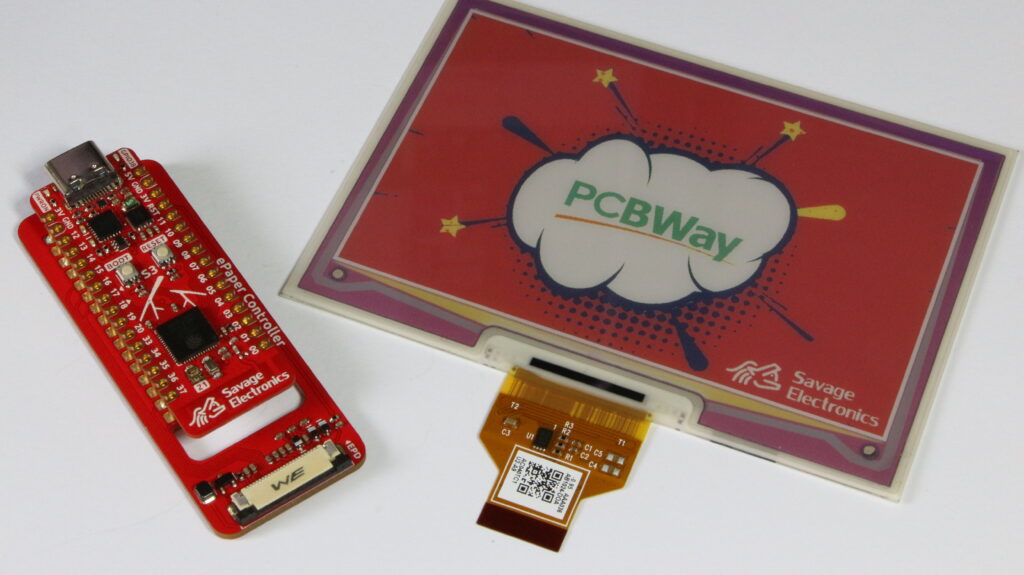
In order to test this new development board I have also designed a 7 Color Paper display driver that interconnects the Stick with a bed of Pogo-Pins that I bought from Aliexpress that are very easy to solder and fit the through-holes quite nicely.
I have really enjoyed working with the ESP32-S3 Stick and the Paper display, but I still have to think about a good final project for it, if you have any ideas you are welcome to leave them in the comments below.
All the files are available on my GitHub if you are interested in making one on your own or also if you want to make some improvements or specific application modifications.


I’ve been using the 44-pin devkit-c knockoffs but find this interesting. Thanks for sharing.
Without actually doing to pcbway or JLC or whomever and deciding on finishes and lots of other questions before getting prices, could you please share what this cost you in say, ten piece pricing? I don’t mind checking the parts shops for the upgraded flash and PSRAM options over base.
How do you get the pogos to stay? I thought those were all about constant pressure like a clip or clamp.
Hi Robert, I am not so sure about the cost it’s been a while since I designed this board and I will say that each board cost it is around $15 (USD), You will only see a price decrease by making more than 50 or so.
I have a 3D print part to make the board Stay/Compress the Pogo-Pins for proper connection, in some other boards I use screws to retain the board.
Hi Josue,
I’m looking for some help about Esp32s3FN8. I based my project on it too but i’m not able to use Arduino IDE with it. I’ve a lot of issues with flash after program it. I already checked with configuration (DIO, QIO, CDC JTAG) etc but i never had a good result. How do you do ? Do you have the same issue at the first start after manufacturing ?
Hi Cyril, I havent experienced any problems when programming that ESP32 module, I can only recommend you to check the restricted pins for the internal Flash memory, those surely can cause some trouble if used for other peripherals.